Difference between revisions of "AGIWiki/How to draw better rooms"
(Created page with "{{AGIWiki}} '''This is a step-by-step tutorial of drawing a room''' '''1:''' It really helps if you start your work by drawing priority lines or by adding them to background vi...") |
(No difference)
|
Revision as of 18:25, 19 May 2012
This is a step-by-step tutorial of drawing a room
1: It really helps if you start your work by drawing priority lines or by adding them to background via command line. See Juha Terho's AGI Background Creation Tutorial .
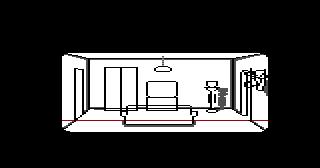
2: Most of AGI rooms have 3 walls and a floor plus ceiling to see, so we're gonna draw this "basic" room too. I made the back wall about 50 pixels high (ego is 36 pixels tall).
3: Plan your room, so that you know how many "objects" need priority function. For example, make sure how many doors, walls where you can walk behind or other objects you're going to draw. If you have a total number then try to fit these objects into priority lines, so that everything would function perfectly. Aswell, think about other objects you're going to draw to the picture.
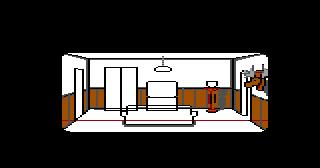
This one right here has two doors, a cupboard, Tv set, a plant with it's "something" (I don't know how is it called in English) and a trophy. In centre of floor there is a sofa.
So only two doors and a sofa will need a work with priorities.
4: I use the way of "from dark to light", that means that first you draw the darkest (black) lines and objects, then you move to lighter colour (dark gray) till you've reached the lightest colours. Seems confusing?. Look at the picture below. I simply draw extra dark gray lines next to black lines, causing shadow and shade effects.
5: I thought that it would look more interesting if I'd use a bit more unusual wall "type". So I drew a wooden covering to the lower part of walls. And I continued with my "from dark to light" project.
Notice: Since I don't deal with logics in this tutorial, I draw the door to the picture. That way, ego can't open it. I you want to be able to operate the door you have to: 1) draw empty doorway instead of this door 2) draw a door in view editor with same size as the doorway 3) write logic to make the door open.
6:Now I finish drawing of the rest of the objects, with colour that matches the interior and rest of the picture. Due to the fact that I drew the wall green, the plant can't use regular green any more and can only use light green. It would be easier to just paint walls another colour, but who said drawing rooms is easy?;)
To make green walls more interesting, I added a cracks and a "piece" of brick wall to it. I also shaded the corners of walls bit more.
And finally, Sofa to violet and floor to red colour.
{{Category:AGIWiki/Tutorials]]


